
Changing your Shopify theme can be an exciting way to give your online store a fresh new look. Whether you’re updating to improve functionality, enhance design, or better reflect your brand, the process can feel a little daunting, especially if you’re worried about losing your existing content. But don’t worry—with the right steps and a bit of preparation, you can change your Shopify theme without losing any content. This guide will walk you through everything you need to know, step by step.
Why Should You Change Your Shopify Theme?
Updating your Shopify theme isn’t just about looks—it’s about improving your store’s overall performance and user experience. Here are some reasons why you might consider making a change:
- Modernize your store’s design: Trends change, and an outdated theme might make your store look less appealing to customers.
- Improve functionality: Newer themes often come with better features, faster load times, and optimized mobile experiences.
- Align with branding: If your business has rebranded, your store’s theme should reflect the new identity.
- Increase conversions: A better-designed store can lead to higher customer trust and more sales.
Things to Do Before Changing Your Theme
Switching themes isn’t as simple as clicking a button. You’ll want to prepare first to ensure a smooth transition. Here’s what you need to do:
1. Backup Your Store Data
Unfortunately, Shopify doesn’t have a one-click backup option, but you can still save your important data:
- Export products: Go to Products > All Products, then click Export to download a CSV file of your product details.
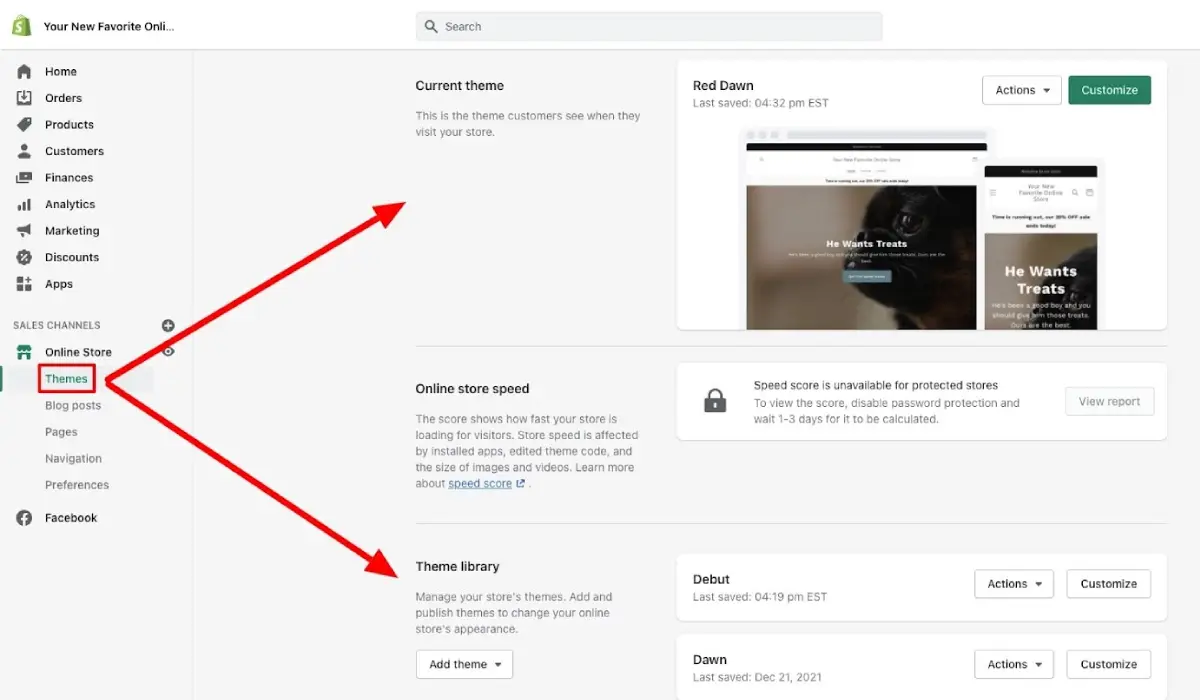
- Download theme files: Duplicate your current theme to save its settings. Go to Online Store > Themes, click the three dots next to your live theme, and choose Duplicate.
- Backup images: Download any custom images you’ve uploaded to your store.
2. Take Note of Customizations
If you’ve made changes to your theme’s code, apps, or settings, document them. Take screenshots of:
- Your homepage layout.
- Navigation menu structure.
- Collection pages and product page designs.
This will help you recreate your store’s look and feel after switching themes.
3. Decide on Your New Theme
Shopify offers free and paid themes. You can browse them in the Shopify Theme Store or use third-party marketplaces like ThemeForest. Consider:
| Feature | Free Themes | Paid Themes |
|---|---|---|
| Cost | $0 | $150+ |
| Customization | Limited | Highly customizable |
| Advanced Features | Basic | Advanced options |
Choose a theme that aligns with your store’s needs and brand image.
How to Change Your Shopify Theme Without Losing Content
Here’s the step-by-step process to switch themes while keeping your data safe.
Step 1: Add Your New Theme
- Go to Online Store > Themes in your Shopify admin.
- Click Add Theme in the top right corner.
- Choose your new theme by:
- Uploading a ZIP file if it’s from a third-party.
- Selecting a theme from the Shopify Theme Store.
Your new theme will appear in your theme library but won’t be live yet.
Step 2: Preview the New Theme
Before publishing, preview how your store will look:
- Click Actions > Preview next to the new theme in your library.
- Navigate through your store to check if everything’s displaying correctly.
- Take notes on any issues you spot.
Step 3: Customize the New Theme
Your new theme will need adjustments to match your brand. Use Shopify’s drag-and-drop editor to:
- Set up your homepage.
- Update colors, fonts, and logo.
- Recreate your navigation menu.
- Ensure your store’s layout is mobile-friendly.
Step 4: Check Your Content
Content like products, collections, and pages usually transfer automatically, but double-check:
- Product pages: Verify images, descriptions, and variants.
- Blog posts: Ensure formatting is consistent.
- Custom pages: Check for missing sections or design elements.
Step 5: Test Everything
Once you’ve customized your new theme, test it thoroughly:
- Navigation: Make sure all menus and links work.
- Forms: Test your contact form, newsletter signup, and checkout process.
- Speed: Use tools like Google PageSpeed Insights to check your site’s performance.
- Mobile view: Open your store on various devices to ensure responsiveness.
Step 6: Publish Your New Theme
When everything looks perfect:
- Go to Online Store > Themes.
- Click Actions > Publish next to your new theme.
- Confirm the action, and your new theme will go live!
Related: 9 Best Free Themes for Shopify Dropshipping Stores
Common Issues When Changing Themes (And How to Fix Them)
Here are some potential problems you might encounter and how to resolve them:
1. Missing Custom Code
If you’ve added custom code to your old theme, it won’t transfer automatically. Reapply the code manually by:
- Going to Online Store > Themes > Actions > Edit Code.
- Adding your custom code to the corresponding files in the new theme.
2. App Integration Issues
Some apps may not work with your new theme. To fix this:
- Reinstall the app if needed.
- Contact the app developer for support.
3. Broken Images
If images are missing:
- Check your theme’s settings to re-upload them.
- Make sure the file names haven’t changed.
Tips for a Smooth Transition
- Test in a Development Store: If you’re unsure about making changes to your live site, create a development store to test the new theme.
- Schedule Your Update: Make the switch during low-traffic hours to minimize disruptions.
- Communicate with Customers: Inform your audience about the update in case there are temporary issues.
- Use Shopify Support: If you’re stuck, Shopify’s support team is available 24/7 to help.
Changing your Shopify theme can feel overwhelming, but with careful planning and attention to detail, you can update your store without losing content. By backing up your data, documenting customizations, and thoroughly testing your new theme, you’ll ensure a seamless transition. Remember, a fresh and functional theme can boost your store’s performance and leave a lasting impression on your customers. Happy selling!